
Introduction
Google Ad Sense is an advertising program that allows website owners to monetize their websites by displaying third party ads to visitors. It’s quite simple to start monetizing your website with Ad Sense. Once your Google Ad Sense account has been approved, all you need to do is insert code in your pages and you can start earning from your website traffic whenever visitors click on ads.
In this blog, we will discuss a step-by-step process for setting up a google Ad Sense account, getting your account approved, verifying address and tax information.
But before we do that, let’s look at what you need before you set up a google Ad Sense account:
Requirements for Setting Up a Google Ad Sense Account
- One, you must have a website.
- Be over 18 to apply, or seek permission from an adult.
- Your website or blog should be compliant with Ad Sense policies.
- Read the Ts&Cs. You can find that at the bottom of the sign-up page.
How to Set Up a Google Ad Sense Account and Effectively Monetize Your Website
- Sign Up
- Fill in Payment Address Details and Wait For Approval
- Provide Tax Information
Step 1: Sign Up
This is the easiest part. After you set up your Ad Sense account, there will be a waiting period during which your account will be reviewed and approved or rejected.
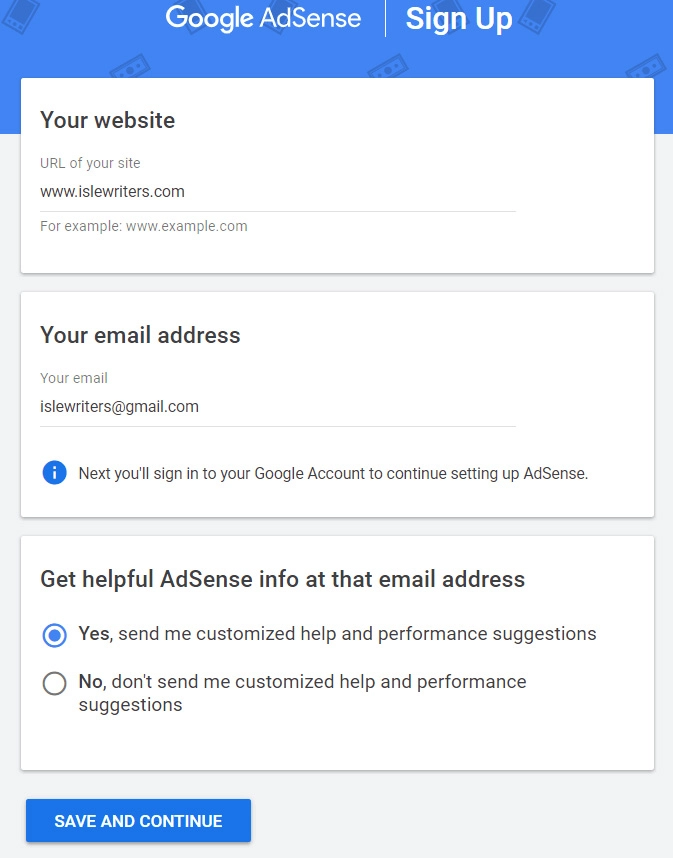
- Go to the sign-up page. https://www.google.com/adsense/signup
- Enter your website url (exclude “http/s” part of the url) and google account. Click “save and continue”.
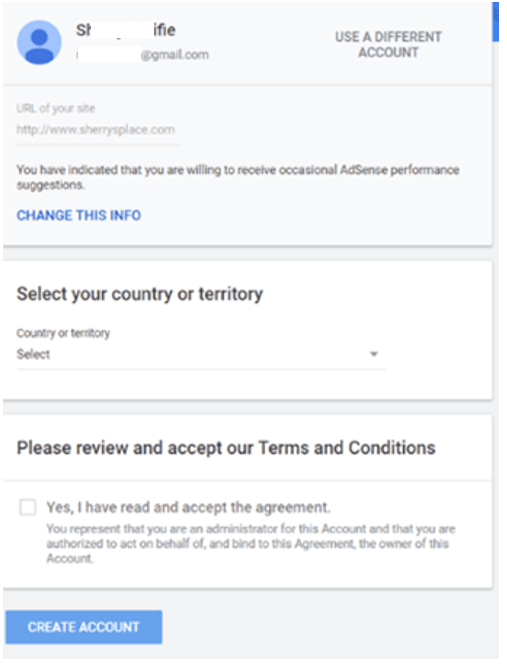
- Select country or territory, accept terms, then click “create account”. You are now signed in to your new Google Ad Sense account.
Step 2: Fill in Payment Address Details and Wait For Approval
At this point, you won’t have access to the tabs on the home page. But you can fill in your payment address. Provide the correct name and address, otherwise you could have trouble later trying to change “payee” name. Payments will be addressed to the name you specify. To get paid, you must attain the $100 payment threshold specified by google.

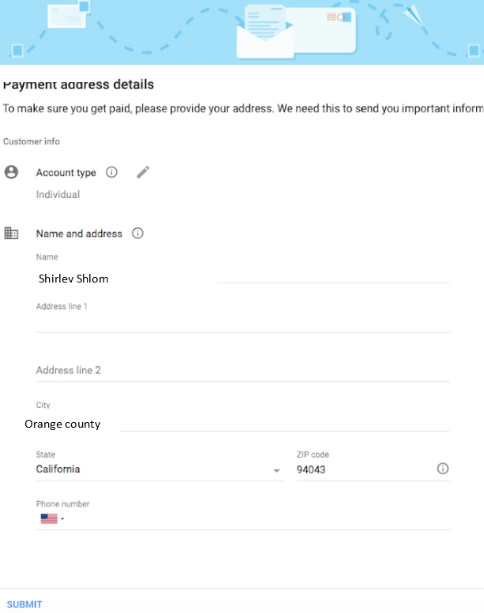
- When you click submit, you will see this message:
 Once the account has been approved, you’ll be able to access the grayed-out tabs.
Step 3: Provide Tax Information
Both US citizens and Non-US publishers need to provide tax information. As a non-U. S person, you will be required to fill in Form W-8BEN if an individual, and Form W-8BEN-E if a company. Otherwise, you will not receive your funds.
- On the Google Ad Sense site, type in your google Ad Sense login.
- In your Ad Sense account, go to “settings”. Select “payments”. Click “manage settings” in the page that loads.

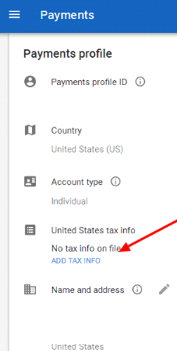
- Click “Add tax info”.
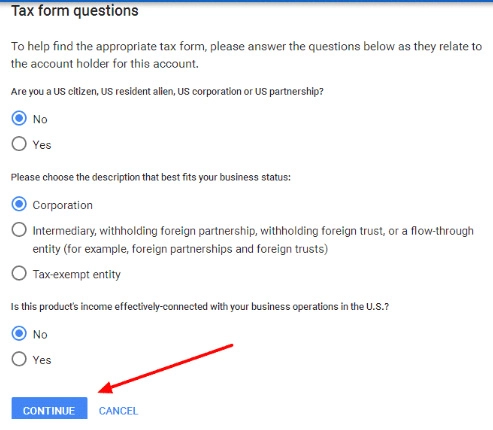
- A series of tax form questions will pop up. Select the options shown by the blue dots in the image below and click “continue” when done.
- Fill the four-part form that loads.
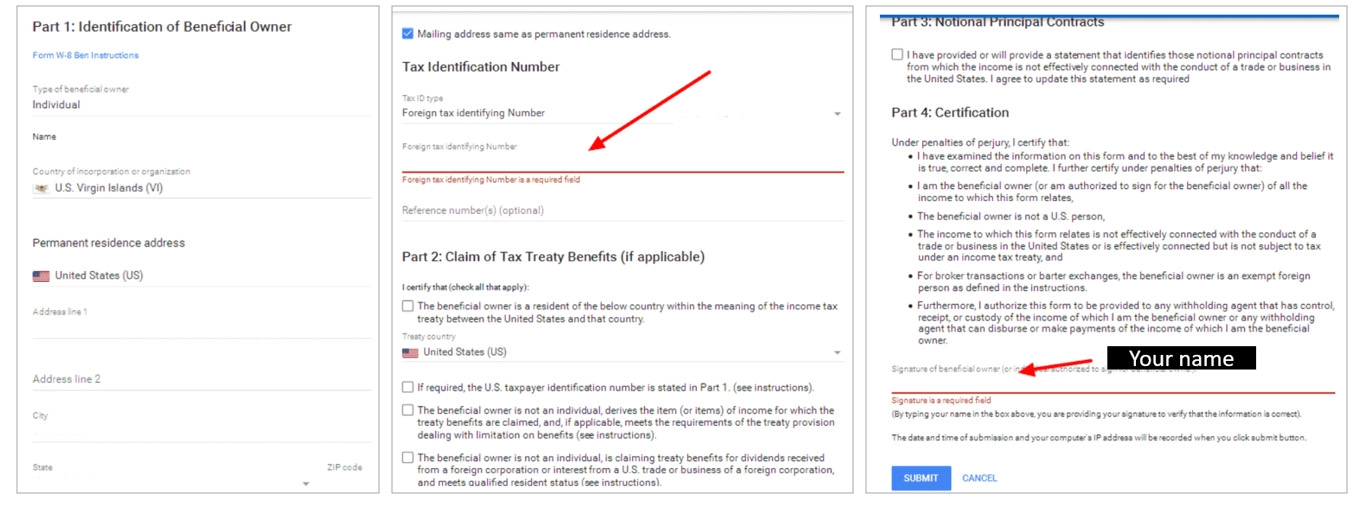
- Once done, click “submit”.
That’s it! Your google Ad Sense account is all set up.
Our blog
Latest blog posts
Tool and strategies modern teams need to help their companies grow.

Our definition of marketing success in B2B is evolving. For years, traditional metric...

Video has emerged as one of the most effective tools to cut through the noise and con...

The way B2B buyers research, engage, and decide has changed and so must the way marke...


